How to Program a Garage Door Opener – Curious if you can get your remote working in under a minute?
We’re Garage Home Pros, family-owned since 2014. We deliver fast, high-quality garage services with a friendly touch. From new garage door installations to emergency repairs, we help homeowners across Polk and nearby counties.
The trick is finding the Learn button on the motor near the antenna. Press and release it, then finish pairing within about 30 seconds while the indicator light is active. For remotes, hold the chosen button until the motor light blinks. For keypads, enter your PIN and hold Enter until the light blinks.
We outline clear instructions and simple steps so you can finish with confidence. If DIY stalls, call us at (321) 200-0727 or email garagehomepros@gmail.com. We serve within a 20‑mile radius, Monday–Saturday, 8:00 a.m.–9:00 p.m., with no after‑hours fees.
Key Takeaways
- Find the Learn button on the motor unit to begin pairing.
- Complete pairing within about 30 seconds while the light is active.
- Remotes and keypads use different button actions; follow each step carefully.
- We provide clear instructions and same‑day help if needed.
- Contact Garage Home Pros for fast, reliable service in your area.
Before You Start: Safety, Tools, and What to Expect Today
Before you climb the ladder, let’s get set for a safe, smooth setup. We prioritize safety and clarity. Have your owners manual nearby and clear the garage so kids and pets stay out of the work area.
Gather the essentials: a sturdy ladder, a flashlight, your remote and keypad, and the owner’s manual for your specific unit. Check power first—confirm the unit is plugged in and the breaker is on.

Safety and quick checklist
- Use a helper to steady the ladder; ladder safety prevents falls.
- Clear the door path so nothing blocks opening and closing tests.
- Use a flashlight in dim garages to read labels and find the button on the motor unit.
What you can expect
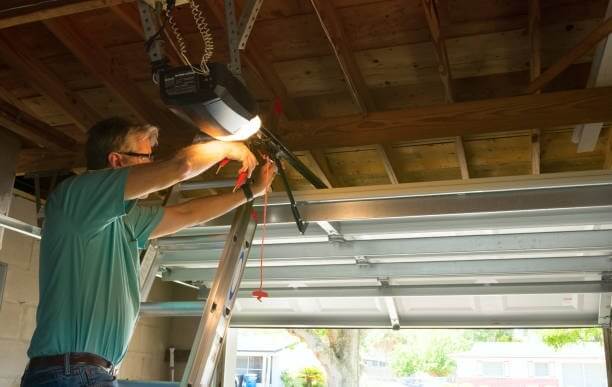
You’ll most likely find the Learn button on the side or rear of the motor unit near the antenna or under a small cover. Sometimes it sits behind a light lens.
Timing matters: after pressing the Learn button you’ll have roughly 30 seconds to finish each action. Plan 10–15 minutes of focused time and keep the instructions from your owners manual handy.
How to Program a Garage Door Opener
Look toward the motor unit; the learn button usually sits near the antenna wire and is color-coded. Common colors are red, orange, yellow, purple, or green. Note the color so you match your model’s sequence.

Press and release the learn button on the motor unit to enter programming mode. An indicator light will illuminate or blink. You then have about 30 seconds to finish the next step.
- Within those seconds, press and hold the chosen remote button until the motor unit’s light blinks or turns off. This confirms pairing.
- Step clear of the door and test the remote from a safe distance. If the door responds, pairing is complete.
- Add other remotes by repeating the learn button step for each handheld device. Keep each remote within a few feet of the unit while pairing.
If nothing happens, wait a moment and repeat the steps; timing windows can be tight. Consult your owner’s manual for the erase procedure if you need to clear all remotes, then reprogram as needed.
We make the process simple and safe. If you prefer, call us at (321) 200-0727 and we’ll handle programming and testing for you.
Keypad Programming Made Simple
Setting a keypad PIN can be quick and secure when you follow clear steps. We keep the process short and reliable so your family can access the home with confidence.

Press and release the learn button on the motor unit to enter programming mode. Then enter a four‑digit PIN on the keypad and hold Enter until the opener’s light blinks. That blink confirms the door opener accepted the code.
- Choose a memorable but hard‑to‑guess PIN. Avoid addresses and repeating digits.
- After entering the PIN, hold Enter for a few seconds and watch the unit light.
- Step back and test the keypad by entering the code and pressing Enter to operate the door.
Want to change the code later? Repeat the exact instructions; the new entry overwrites the old PIN. Check your owners manual for model specifics and button layouts.
If setup stalls, we’ll get it working fast—call (321) 200-0727.
Program Your Car’s Built‑In Buttons (HomeLink and Similar Systems)
Many drivers expect their built‑in car buttons to just work—yet pairing often takes two quick steps. We guide you through clearing the in‑car memory, training the car button, then syncing at the motor unit.
Clear the in‑car memory first. Follow your vehicle guide for the reset. Then pick the car button you want to use.
- Hold that car button and your handheld remote together until the in‑car indicator changes. This links the signals.
- Walk up to the unit, press the learn button, then within about 30 seconds press the trained car button to complete the sync for rolling‑code systems.
- Repeat for extra buttons so every driver has access.
If the car does not respond, give the training a bit more time and move the remote closer to the vehicle receiver. Some vehicles label the homelink button differently; check your dash or visor for the correct control and indicator.
We help homeowners sync homelink and similar systems every day. If you’d like us in your driveway, we’ll come within our 20‑mile service area and finish the job quickly and safely.
Troubleshooting Programming Issues
Stalled pairing is usually a timing or signal problem that we can diagnose quickly. Below are clear checks you can run in minutes. If you’re stuck, we offer quick diagnostics and same‑day fixes—no after‑hours fees within our service window.
Nothing happens? Check LED feedback, distance, and timing
Watch the unit light. After you press Learn you have about 30 seconds to finish each action. If the LED never blinks, you likely missed the timing window or the battery is weak.
Stand closer while pairing. Walls, shelving, and metal can block the signal. If it almost worked first but failed on the last tap, wait a few seconds and try again within the active window.
Rolling code vs. fixed code: why last year’s steps may not work
Many units use rolling code security. Steps that worked first or years ago may not match modern sequences. If your remote or built‑in system won’t accept the signal, clear the learned codes and start fresh.
Signal interference, weak batteries, and persistence
Replace remote batteries before lengthy troubleshooting. Remove nearby interference like LED shop lights, routers, or large metal racks. Check the antenna wire on the opener unit for damage or misplacement.
- Watch the opener LED; no blink often means a timing problem.
- Stand within a few feet during pairing and remove obstacles.
- Clear codes and repeat the sequence when failures persist.
If the problem continues, call us. We’ll run a quick video check or on‑site test and get the system working the same day.
When to Call the Pros at Garage Home Pros
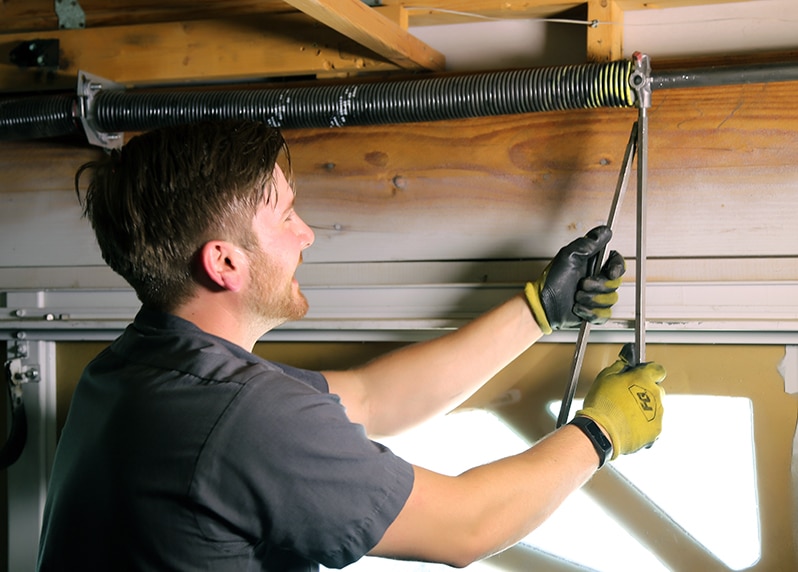
Some issues need trained hands—especially when springs, cables, or tracks are involved.
We respond quickly when programming fails repeatedly or the door behaves unpredictably during testing. Our team repairs broken springs, replaces cables, and realigns doors off track. These tasks are risky for owners without tools and training.
Fast help for programming problems, off-track doors, broken springs, and more
- Call us if repeated programming attempts fail or the door acts erratically during tests.
- If a door is off track, stop and call—forcing it can make the damage worse.
- Broken springs and snapped cables are dangerous; our trained techs handle safe repairs fast.
- We diagnose openers, keypads, sensors, and the motor unit, then offer clear options with upfront pricing.
- Homeowners count on same-day service to get doors moving smoothly today; we service all residential garage doors and openers.
Call (321) 200-0727 or email garagehomepros@gmail.com for emergency garage door repair, Monday–Saturday, 8:00 a.m.–9:00 p.m. We stand behind our work as a family-owned team in your community.
Local, Family‑Owned Service You Can Trust
Our team answers local calls fast and treats every house like our own. We’ve served homeowners in Davenport, FL and nearby towns since 2014. That gives us over 10 years of hands‑on experience repairing doors and openers with care and transparency.
Contact Garage Home Pros
Call (321) 200-0727 or email garagehomepros@gmail.com for friendly, expert help today.
Service area and hours
We respond quickly within a 20‑mile radius covering Polk, Osceola, Lake, Orange, and Seminole counties.
Hours: Monday–Saturday, 8:00 a.m. – 9:00 p.m. No after‑hours fees.
What we do
- Garage door repair and installation, openers repair and replacement.
- Broken springs, snapped cables, and doors off track handled safely.
- Residential and emergency repairs with clear pricing and on‑time crews.
- Save and share this guide; we’ll add more videos and links you can watch later.
We’ve been family‑owned since 2014 and care for your home like it’s ours. Call or email and we’ll be there the same day when possible.
Conclusion
In short, a few careful steps and the right timing unlock reliable access. ,
Need a hand? You now have clear instructions and steps for remotes, keypad PINs, and car systems like homelink. Keep your manual or owners manual nearby for model notes and extra button sequences.
Remember the timing: press the learn then finish each action within the set seconds so the unit captures the signal. For car links, train the remote first, then hit the learn button on the unit to complete the link.
Watch the motor and lights for confirmation and stand to the side of the moving door for safety. If a remote or keypad won’t respond, try again, check batteries, or call us.
Need a hand finishing setup or fixing a stubborn problem? Call (321) 200-0727 or email garagehomepros@gmail.com. Emergency garage door repair: Monday–Saturday, 8:00 a.m.–9:00 p.m., no after‑hours fees.