Can I Replace Garage Door Spring Myself?
Curious whether a DIY fix is worth the risk? Many homeowners weigh cost against danger when a broken spring leaves a car trapped or a door stuck. This guide answers that question up front and explains why the choice hinges on risk tolerance, skill, and proper tools
Springs hold extreme tension. Mishandling them can cause serious injury or property damage. For that reason, safety is our top priority and why many choose professional service.
We are Garage Home Pros, a family-owned team serving Polk, Osceola, Lake, Orange, and Seminole counties since 2014. We offer fast repairs, new installations, and emergency repair with hours Mon–Sat 8:00 a.m.–9:00 p.m.
This section previews what you will learn: spring types, measurement, high-level replacement steps, common mistakes, time and cost comparisons, and when to call an expert for repair. If your car is trapped, call (321) 200-0727 or email garagehomepros@gmail.com for same-day help.
Key Takeaways
- DIY work on a spring garage door carries significant risk.
- True winding bars, correct sizing, and training matter most.
- Professionals typically finish in 1–2 hours with safer results.
- Springs last about 10,000 cycles; maintenance affects lifespan.
- Garage Home Pros offers fast, local expert service and emergency repair.
What this guide covers and why safety comes first
This guide maps each step and highlights safety as the non-negotiable priority. We outline what you will learn, from identifying spring type to measuring, high-level replacement steps, and post-repair maintenance.
Safety matters because stored tension can release violently and cause accidents or serious injury. Releasing tension incorrectly may send parts recoiling or let a heavy door fall. Professionals reduce risk by using PPE, disconnecting the opener, securing the door, and controlling tension with proper tools.
We explain how the whole system depends on balanced springs for smooth operation. Regular inspections and simple lubrication extend life beyond the typical ~10,000 cycles and reduce wear.
- Clear steps so you know what to expect at each stage.
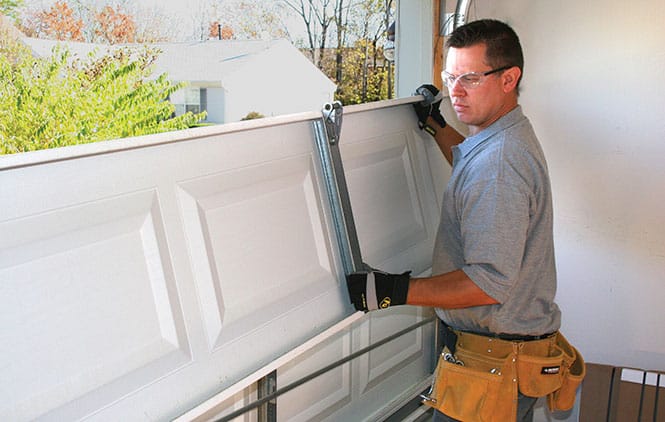
- Essential precautions pros follow: safety glasses, gloves, and proper winding bars.
- When to stop and call a trained technician for safe, same-day help.
If anything feels uncertain, call Garage Home Pros for prompt assistance: (321) 200-0727 or garagehomepros@gmail.com. We put safety first so your system works reliably and your home stays protected.

Can I replace garage door spring myself
Tensioned hardware stores a lot of force; one slip can turn a routine fix into a serious accident. We want homeowners to weigh savings against real risks before attempting work.
Short answer: possible, but high risk
Yes, a skilled person may perform a garage door spring replacement, yet the task demands true tools and steady technique. Incorrect release of tension, overwinding, or wrong sizing can cause major injury or damage. Pros usually finish in 1–2 hours; DIY often takes much longer.

Weighing savings versus liability
DIY savings must be balanced against potential medical bills, broken panels, or a ruined opener. A single misstep may create liability exposure for homeowners and lead to premature wear on springs and hardware.
Who should never attempt replacement
- Anyone lacking proper winding bars or uncertain about measuring springs and coils.
- People uncomfortable on ladders or working overhead.
- Those who prefer not to risk injury or property damage.
If you’re unsure, lack tools, or need same-day help, call Garage Home Pros. Family-owned since 2014. (321) 200-0727 — garagehomepros@gmail.com. A trained technician reduces risk and restores safe operation fast.
Garage door spring types and how they work
Different spring types power most overhead systems, and each works in its own mechanical way. We outline how each design operates and what to watch for so you know when to call for service.
Torsion springs sit above the opening on a steel shaft. They store rotational energy to counterbalance the panel, making lifting smooth and controlled. Typical life is about 10,000 cycles, though heavy use lowers that number.
Extension springs run along the track sides and stretch as the panel moves. These systems must use safety cables to contain a failed coil and protect people and parts. Extension setups are often less costly but need careful checks.

- Most failures come from normal wear, corrosion, or poor maintenance.
- Wrong size or type upsets balance and stresses the opener and panels.
- Routine lubrication with silicone-based products and balance tests extend life.
We handle torsion and extension springs safely and quickly. Call Garage Home Pros for guidance on your specific system and same-day service when needed.
Critical safety precautions before any DIY attempt
Before any DIY work begins, take a moment to lock down basic precautions that protect you and your property. We stress proper gear, clear footing, and slow, controlled work.
Personal protective equipment and ladder practice
Wear safety glasses and sturdy gloves. Protect eyes and hands from debris and sudden movement. Position the ladder on level ground and maintain three points of contact. A helper improves stability and tool handling.
Securing the opening and stopping unwanted movement
Disconnect the opener before touching hardware. Clamp or vice-grip the bottom rail to prevent the panel from moving. Safety cables should be present on extension setups to contain a failed coil.
Why proper winding bars matter
Use genuine winding bars for any tensioned work. Makeshift tools like screwdrivers or plier handles slip and cause serious injury. Stand to the side of cone ends while winding or unwinding to avoid recoil.
Understanding stored tension and knowing when to stop
Closed panels place the greatest tension on torsion units. Release tension slowly with the right tools and steady hands. If sizing is unclear, set screws are stuck, or cones seem misaligned, stop and call a technician.
When in doubt, call Garage Home Pros for safe, same-day help: (321) 200-0727 — garagehomepros@gmail.com.
Tools and materials you’ll need for spring replacement
A well-organized set of tools reduces risk and speeds up every repair step. Gather gear before you start. Good preparation helps us work cleanly and safely.
Winding bars, vice grips, wrenches, and lubricant
Essential items: solid steel winding bars sized to your cone, safety glasses, and sturdy gloves. Add vice grips (locking pliers) and an adjustable wrench or socket set for fast, secure hardware work.
Safety cables, clamps, and proper ladder setup
Use clamps or sturdy locks to secure the bottom rail and prevent movement while working. Extension systems need safety cables to contain a failed coil. Position a ladder on firm, level ground and keep a helper nearby.
Selecting the correct replacement springs and hardware
Measure length, inside diameter, and wire size to avoid a misfit. Match the replacement parts to your opener and existing brackets. Use silicone-based lubricant on moving parts to reduce wear and noise after installation.
- Keep tools on a nearby caddy so both hands stay ready during winding.
- Choose replacement parts by accurate size measurements to protect panels and the opener.
- We supply the right parts and perform the work safely. For same-day service, call (321) 200-0727.
Measuring springs accurately to avoid misfit and hazards
Measuring with care avoids ordering parts that fail to fit or handle tension safely.
Length, inside diameter, and wire size matter. Measure spring length end-to-end from the first visible coil to the last. Record the inside diameter — common sizes are 1-3/4″ or 2″.
Length, inside diameter, wire size, and coil count
Determine wire size by measuring 20 coils, dividing that length by 20. That gives a precise wire diameter for matching parts.
Correct size prevents poor balance, extra wear, and unsafe operation.
Left-wind vs right-wind identification tips
Identify winding by cone or drum position. Left-wind sits opposite a right-wind on the shaft. Matching wind direction keeps torsion systems stable under tension.
- We show how to measure length with a tape from first to last coil.
- We explain inside diameter and why cones must fit precisely.
- We demonstrate the 20-coil method so you order the right wire size.
Mistakes are dangerous: a misfit spring may cause the panel to fly open or slam shut. On two-spring systems, replace both since worn parts work as a pair.
If measuring feels uncertain, we’ll identify and supply the correct parts and complete the job safely. Contact Garage Home Pros for help.
High-level steps to replace garage door springs
A stepwise approach keeps risk low and helps the installation proceed smoothly. Below are the core phases we follow when performing a safe replacement.
Prepare the workspace and disconnect power
Clear vehicles and tools, then unplug the opener and lock out power. Good lighting and a helper improve safety and speed.
Secure the door with clamps and vice grips
Clamp the bottom rail and set vice grips on the track to stop any unwanted movement. This protects people and parts during tension work.
Carefully release tension from the old spring
Use actual winding bars and step down tension slowly. Stand out of the recoil path and keep hands on the bars until the cone is secure.
Remove the damaged spring and related hardware
Loosen set screws, detach cables and brackets, then slide the coil off the shaft. Keep fasteners organized for reassembly.
Install, tension, and align the new spring(s)
Fit the new unit and align cones and drums. Wind to the specified count for your panel, set cables evenly, and torque set screws to spec.
Lubricate, reconnect the opener, and test balance
Apply lubricant, reconnect the opener, test sensors, and run a final balance check. A properly balanced panel stays mid-way when opened by hand.
If any step feels unsafe, we’re ready to help the same day. Garage Home Pros: (321) 200-0727 — garagehomepros@gmail.com. Pros usually finish in 1–2 hours when parts are correct and accessible.
DIY mistakes to avoid that can ruin doors and openers
A single wrong turn or part choice may turn a simple service into costly damage. We stress clear steps and stop points so work stays safe and predictable.
Overwinding or underwinding torsion units
Overwinding can make the panel shoot upward and crush the torsion tube. That motion may bend hardware and cause major damage.
Underwinding leaves the door unbalanced. The opener does extra work, shortens its life, and may fail under load.
Purchasing the wrong size or type
Wrong size or wrong type throws the system off balance. Uneven motion follows and parts wear fast.
Measure length, inside diameter, and wire size before ordering. If measurements don’t match, stop and call for professional sizing and replacement.
Working without securing the panel
Never work on an open panel without clamps or vice grips. A sudden fall can break glass, bend tracks, or cause severe injury.
Removing bottom brackets under tension
Removing bottom brackets while springs hold tension is one of the most dangerous mistakes. Fasteners may strip, cones bind, or parts eject violently.
- Use true winding bars, not makeshift tools like screwdrivers.
- Count measured turns and follow torque specs to avoid overwinding or underwinding.
- Secure tracks and the bottom rail before loosening any hardware.
- Stop immediately if cones bind, fasteners strip, or measurements mismatch—call for repair.
Safety is non-negotiable. We’re here to correct issues safely if a DIY attempt goes wrong. For friendly, first-time-right repairs, call Garage Home Pros for same-day help.
Costs, time, and what to expect from the job
Understanding real costs and hidden hours helps you make a safe, smart choice. We break down what a DIY attempt costs versus professional service so you know the likely outcome.
Parts, tools, and hidden time costs of DIY
Parts for a DIY replacement often run $75–$150. That price excludes specialty tools like true winding bars, vice grips, and PPE.
Missing tools add trips and delays. Sourcing parts by size and matching wind direction eats up time and raises the risk of damage.
Typical pro replacement pricing and value
Professional replacement usually starts around $400 for parts and labor. That covers correct sizing, safe removal, installation, and balance testing in one visit.
We bring the right parts, test the opener, and reduce follow-up visits. That often saves money compared with corrective repairs after a DIY error.
How long the job takes: DIY vs professional service
A trained technician typically finishes in 1–2 hours. A homeowner working cautiously may spend several hours to a full weekend.
- DIY costs: parts, missing tools, PPE, and your time.
- Pro service: correct sizing, safety checks, and same-day completion.
- Improper work risks added damage to panels, tracks, or the opener.
We provide transparent pricing and same-day scheduling in our service area. Call (321) 200-0727 for a quick estimate from Garage Home Pros.
Signs your door springs need replacement now
Early warning signs often show up as heavy movement, odd noises, or visible metal fatigue. Spotting problems early helps prevent sudden failure and keeps people safe.
Heavy, jerky, or unbalanced movement: If the panel feels heavy or won’t hold mid-way when lifted by hand, the springs may be losing tension. Don’t force the opener—this strains the motor and other parts.
Visible damage and rust
Scan the coils for gaps, rust, or distortion. These are clear signs the spring is compromised and near failure. On torsion systems, check both coils; worn parts often fail together.
Loud bangs, squeaks, or missing cables
A loud bang inside the garage usually means a spring snapped under tension. Squeaks and grinding noises warn of wear. On extension setups, confirm safety cables are present; missing cables raise risk of flying parts.
- We explain the simple “heavy door” test: lift by hand and see if it stays mid-way.
- Inspect coils for visible gaps, rust, or bends—these indicate a compromised spring.
- If you hear a bang, stop using the opener and do not force movement.
- Confirm safety cables on extension systems; missing cables create serious hazards.
- Pause use to prevent further stress on the opener and reduce sudden closure risk.
If you notice these signs, avoid using the opener and call Garage Home Pros for fast, safe diagnostics and repair. We’ll inspect, confirm the issue, and often complete a safe replacement the same day.
After replacement: testing, balancing, and ongoing maintenance
After a successful install, a short set of checks keeps the system safe and quiet. We run tests that confirm the unit is balanced and that safety sensors work before we leave.
Start with a basic balance check. Disconnect the opener and lift the panel by hand. A well-balanced panel stays mid-way without drifting.
Next, we verify the opener settings and photo-eye alignment. We adjust travel and force limits so the door open and close cycles stop if an obstruction appears.
Lubrication reduces wear and noise. Apply silicone-based lube to hinges, rollers, and coils a few times a year. That small step saves time and prolongs parts life.
- How to check balance so the door stays mid-way.
- Verify sensor alignment and fine-tune force and travel.
- Lubricate moving parts several times per year to cut friction and noise.
- Recheck tension if the panel feels heavy, noisy, or starts to drift.
- Schedule routine maintenance visits to keep the system tuned and safe.
If the panel drifts, makes new noises, or feels heavy, contact us for a follow-up inspection. For maintenance visits or a quick tune-up, call Garage Home Pros: (321) 200-0727. We’ll ensure your springs and related parts stay reliable over time.
Prefer expert help? Call Garage Home Pros for safe, same-day service
We respond quickly when a broken spring or other failure stops your daily routine. A timely expert visit limits damage, confirms correct sizing, and restores safe operation in about 1–2 hours for most jobs.
Family-owned since 2014 with fast, friendly, first-time-right repairs
We’re family-run and focused on trust. Our technicians arrive ready to identify springs, measure precisely, and perform safe tension release and installation.
Emergency garage door repair with no after-hours fees
Emergency service is available Mon–Sat, 8:00 a.m.–9:00 p.m. We do not charge after-hours fees. Closed Sundays.
Service area: within 20 miles across Polk, Osceola, Lake, Orange, and Seminole counties
We cover a 20-mile radius and dispatch promptly across our service area for same-day repair and installation needs.
- Complete services: garage door repair, installation, opener repair & replacement, broken springs and cable repair, and off-track door repair.
- We arrive prepared to identify parts, release tension safely, balance, lubricate, and test systems fully.
- Scheduling is simple—call (321) 200-0727 or email garagehomepros@gmail.com for prompt service.
Conclusion
Professional service reduces hazards while restoring smooth operation in about 1–2 hours. We handle spring replacement and full installation with precise measurement and controlled tension. That approach avoids common errors like mis-sizing, incorrect winding, and unsecured panels.
Key takeaways: identify the correct part, follow strict safety steps, control tension carefully, and verify balance and sensors before returning the system to service. Regular lubrication and quick checks extend life beyond the typical ~10,000 cycles.
While some homeowners try to replace garage door springs, the safest path is expert help. Book a same-day visit with Garage Home Pros for spring replacement, opener adjustment, or full-system checks.
Call (321) 200-0727 or email garagehomepros@gmail.com for fast, friendly, and professional door repair.