How to Program New Garage Door Remote – Can a simple series of button presses save you time and give your family real peace of mind?
We are Garage Home Pros, a family-owned team serving Polk, Osceola, Lake, Orange, and Seminole counties since 2014. We help homeowners with opener repairs, spring fixes, cable repair, and full installation. Our goal is clear: make setup safe and dependable.
This short guide shows the typical steps used with most openers. Press the Learn button, sync the remote within the timed window, and confirm success when the opener light blinks or you hear a click. We also cover clearing memory and keypad setup for common brands.
Count on fast response and friendly service. We work Monday-Saturday, 8:00 a.m.-9:00 p.m., and we offer same-day help without after-hours fees inside our service area. Call (321) 200-0727 or email garagehomepros@gmail.com for professional support.
Key Takeaways
- We show clear, safe steps so you can operate your garage with confidence.
- Most setups use the opener’s Learn control and a short sync window.
- We include brand-style notes and a universal method to save time.
- Safety tips: clear the area, use a stable ladder, and keep pets away.
- Battery checks, antenna position, and a full memory reset solve many issues.
- Prefer a pro? We offer same-day residential service and repairs.
What you’ll need before you start programming
Before you begin, gather a few simple items to make the setup smooth and safe. We recommend preparing so the actual sync goes quickly and without fuss. If you’d rather have us handle everything, we offer quick, local service Monday-Saturday, 8:00 a.m.-9:00 p.m. Call (321) 200-0727 or email garagehomepros@gmail.com.

- Make sure the garage door opener has power and the light cover is secure so the learn button and control are visible.
- Locate the learn button near the antenna wire; many units show an LED when ready after a press and release.
- Check the transmitter battery; press any button and confirm an LED lights for adequate power.
- Clear the area, confirm sensors are unblocked, have a stable ladder, and set a timer—most units give 15–30 seconds to finish the sync.
How to program new garage door remote: the quick, universal method
A quick, universal sequence gets most openers synced in under a minute. We walk through the basic routine so you can finish safely and with confidence.

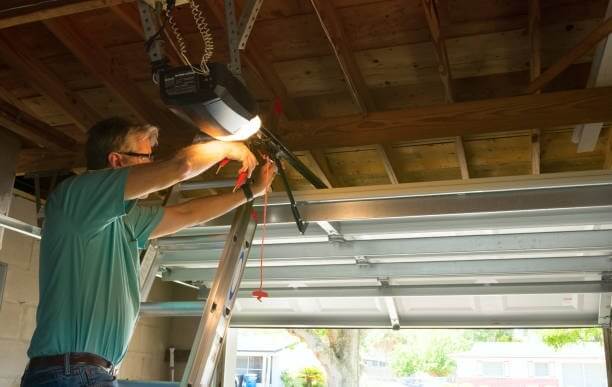
Enter programming mode on the opener using the Learn button
Press and release the opener’s Learn control. This puts the unit into programming mode and starts a short timed window.
Within 15–30 seconds, press hold on the chosen button on your remote. Watch for the opener light to blink or an audible click, then release button to complete pairing.
Optional but recommended: erase old codes first
If you need a fresh start, press and hold the Learn control for about six seconds until the LED goes out. That clears stored codes.
After a memory clear, add only remotes you trust. Repeat the same routine for each unit you want paired. Many keypads pair by pressing Learn, entering a four-digit PIN, then pressing the keypad’s confirmation key within a short window.
- Start with power on and a clear area.
- If syncing fails, check battery and repeat the learn sequence.
- Confirm only intended door opener remote units work after setup.
If any step feels uncomfortable, we can handle it for you—same-day service in our local area with no after-hours fees. Call (321) 200-0727.
Brand-specific steps for popular garage door openers
Different brands need slightly different sequences. Use the brief notes below for the most common models and follow the timing windows carefully.

LiftMaster / Chamberlain / Craftsman (standard)
Press and release the learn button on the opener. Within 30 seconds, press hold the chosen button on the handheld until the light blinks or you hear a click.
LiftMaster MAX series (890MAX / 893MAX)
Enter programming on the handheld first. Match the opener’s learn button color and press the button the correct number of times: Yellow 1, Purple 2, Red/Orange 3, Green 4. Then press the opener’s learn control and the programmed button to finish.
LiftMaster 375UT-style universal
Open the battery cover, hold the program button until the LED lights, press the opener’s learn control, then press the chosen button the required number of times by color (Yellow 8, Purple 3, Red/Orange 2, Green 4). Exit programming by pressing the program button.
Genie units
Press and hold the opener’s program button until the round LED turns blue and the long LED flashes. Press and release the handheld button twice. LEDs will flash when pairing succeeds.
Precision-style keypads
Press and release the learn button on the opener, enter a four-digit PIN on the keypad, then press Start/Stop within 15 seconds to complete setup.
- If the indicator light doesn’t flash, check the battery and repeat the sequence.
- Identify the learn button color when model details are unclear; follow the closest color-based steps.
- Need hands-on help with any model or keypad? We’re nearby and ready. Call (321) 200-0727 or email garagehomepros@gmail.com.
Troubleshooting and safety while programming
When a unit won’t pair, simple fixes usually restore reliable operation fast. Start with quick checks before repeating the learn steps or replacing parts.
If the remote won’t sync: battery, range, antenna, and memory reset
Replace the battery first. A weak battery often stops a signal from reaching the opener during the short seconds window while the control is active.
- Confirm you’re within range and the hanging antenna points down and is undamaged.
- If older units interfere, clear stored codes by holding the Learn control about six seconds until the indicator light goes off, then re-add remotes you want.
- Check photo-eye sensors for dirt or misalignment; blocked sensors can cause intermittent door movement instead of a programming fault.
- If the Learn LED never lights, verify power and that the motor cover and light cover are in place so the light shows status.
Safety first: clear the area and follow instructions
Keep kids and pets away while testing. Stand clear of the door path and use a sturdy ladder on level ground when accessing the opener. Avoid overreaching when pressing the button near the Learn control.
If these steps don’t resolve the issue, we’ll diagnose the opener, the remote, and the wiring to restore reliable operation quickly. If DIY fixes fail, call (321) 200-0727 for emergency garage repair. We offer service with no after-hours fees during regular hours.
Advanced options: universal remotes and in-vehicle buttons
If you want broader compatibility, universal transmitters and in-car buttons offer flexible control for multiple openers. These options reduce clutter and let one device handle several installations.
Universal units usually start by entering programming mode on the handheld. Next, press the opener’s learn button and complete pairing on the handheld. Some models use color-based press counts to match the protocol. Follow the pattern for your model and finish within seconds for a clean link.
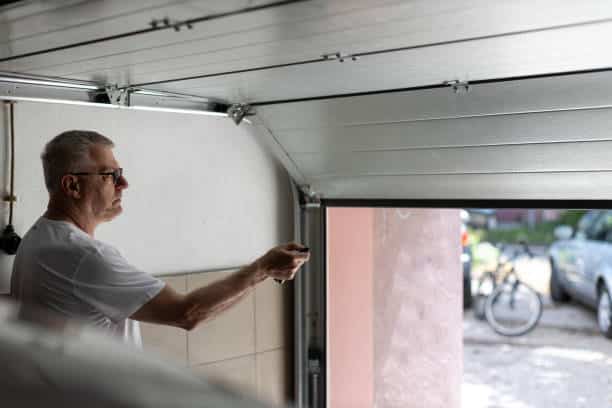
Programming in-vehicle buttons
Most vehicles train by holding the car’s button until its indicator flashes. Press the opener’s learn button, then press the in-car button again to confirm. Watch the vehicle indicator for a successful signal and test the assigned button.
- Most universal handhelds pair across major brands by entering programming mode, syncing with the learn control, then finalizing on the handheld.
- Keep the vehicle close during the process and use the program button on the handheld to exit setup.
- Assign one button per door and test each action independently for safety and convenience.
Want us to set this up for you? We can evaluate compatibility, pick the right model, and handle vehicle button setup during the same visit. Call (321) 200-0727 and we’ll program garage door openers or program garage systems on arrival.
Need help now? Contact Garage Home Pros for local, same-day support
For urgent issues, our local technicians arrive ready with parts and tested steps. We handle programming, syncing, and mechanical fixes on the same visit whenever possible.
Call (321) 200-0727 or email garagehomepros@gmail.com for fast assistance
Call or email and we’ll schedule same-day service Monday–Saturday, 8:00 a.m.–9:00 p.m. We explain costs up front and work with clear timing so you know what to expect.
Emergency repair with no after-hours fees, Mon–Sat within 20 miles
We offer emergency garage support during posted hours with no premium for evening visits. Our team arrives stocked to fix openers, replace springs, or repair cables quickly and safely.
Proudly serving Polk, Osceola, Lake, Orange, and Seminole counties
Family-owned since 2014, we treat your home like our own. Our residential services include installation, opener repair and replacement, broken spring swaps, and doors off track.
- Fast scheduling: call (321) 200-0727 or email garagehomepros@gmail.com.
- On-site work: we tune openers, set keypads, and sync remotes during the visit.
- Reliable service: clear quotes, safe practices, and lasting repairs.
- Coverage: Polk, Osceola, Lake, Orange, Seminole — within 20 miles for most jobs.
Conclusion
Finish strong with a short checklist that keeps your opener reliable and safe. Use the learn button and press the handheld within the 15–30 seconds window. Hold Learn about six seconds to clear memory before adding trusted units.
Watch the light or listen for a click. Replace weak batteries and check antenna position when signals fail. For keypads, follow Learn, enter PIN, then press the confirmation key within the timing window.
When you want expert help, we’re here. Family-owned since 2014, we offer fast, same-day service and repairs with no after-hours fees during service hours. Call (321) 200-0727 or email garagehomepros@gmail.com for dependable support with your garage door opener and programming needs.