Garage Door Spring Adjustment can make the difference between a smooth, effortless lift and a sudden, dangerous failure. Do you know when a quick tweak can stop a heavy door from breaking down? Many homeowners assume a noisy track or uneven lift is a minor issue, but these are often early warning signs of imbalanced tension and worn springs. Understanding when and how spring adjustment is needed helps keep your garage door operating safely, quietly, and reliably
We are Garage Home Pros, family-owned since 2014, serving Davenport, FL and nearby counties. Our team brings a caregiver mindset to each call. We work safely, using solid steel winding bars and verified procedures to protect your family and property.
Our process starts with inspection and ends with testing. We check balance with a halfway lift test, set expected winding counts, and lubricate with lithium or silicone spray. You get fast, professional service without surprise fees and same-day emergency help within a 20-mile radius.
Key Takeaways
- Safety first: proper tools and methods protect people and property.
- Balanced springs reduce strain and extend system life.
- Typical winding benchmarks help set expectations, but each job differs.
- We test balance and opener function before we leave.
- Local hours, no after-hours fees, and same-day emergency repairs available.
What this how-to covers, safety first, and who should do garage door spring adjustment
Begin with the door closed, the opener unplugged, and the tracks clamped above the bottom rollers. Wear eye and hand protection at every step. Never use screwdrivers as winding bars.
This guide shows how to identify spring types, pick the right tools, follow step-by-step torsion and extension methods, and finish with balance and lubrication checks. We also explain quarter-turn increments and why small changes plus frequent tests matter.
- Safety essentials: power off, clamp tracks, use solid winding bars, and clear the work area.
- When to stop: if you see damage, hear a loud bang, or feel unsure, get professional help.
- Prep and PPE: good lighting, an alternate exit path, phone ready, gloves, and eye protection.
- Small steps: make quarter-turns, test often, and avoid overcorrection to reduce injury risk.
If any step feels unclear, we can take over the same day. Call (321) 200-0727 or email garagehomepros@gmail.com — Monday to Saturday, 8:00 a.m.–9:00 p.m., no after-hours fees.

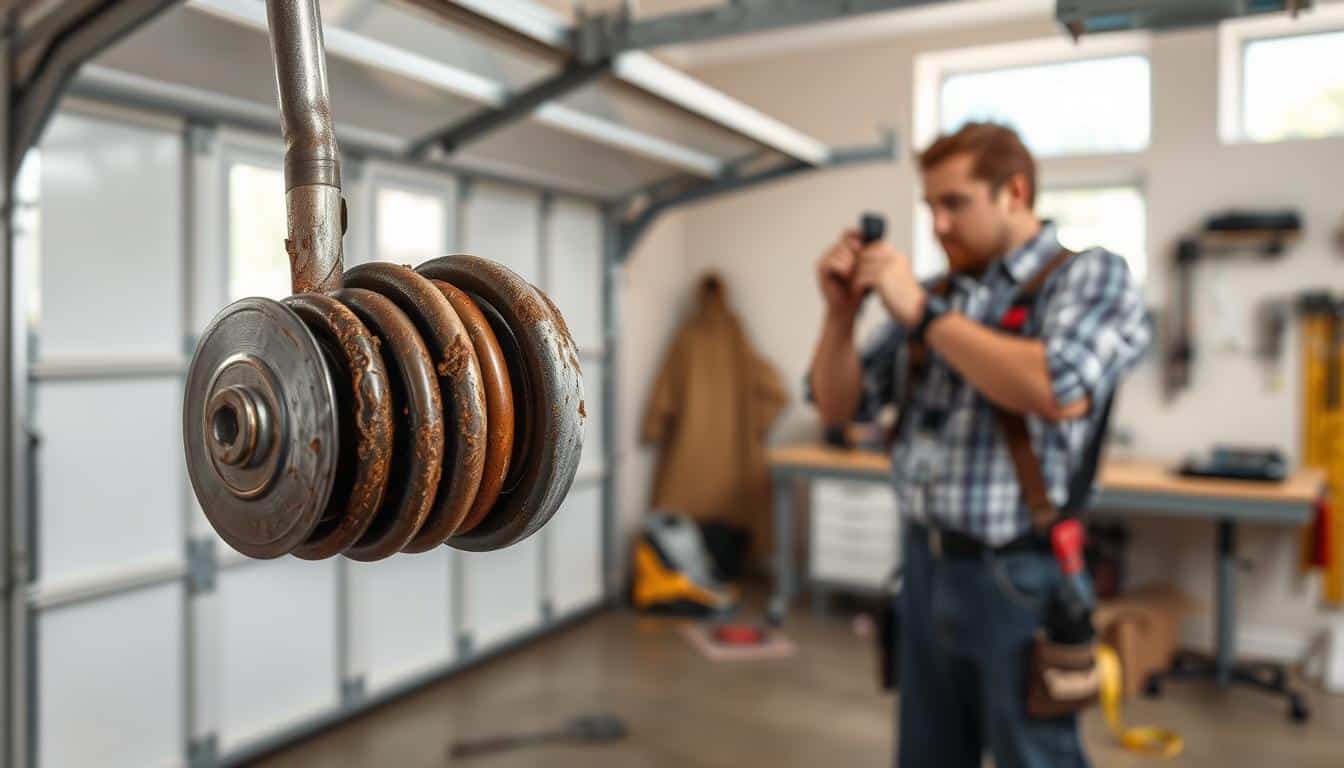
Identify your garage door springs before any adjustments
Step one is a quick visual check to tell whether you have torsion or side-mounted springs. This tells us which parts to inspect and whether a simple service or a full replacement is needed.

Torsion systems: above the header
Look above the opening for a center shaft with coils, a winding cone, and set screws. The cone and screws are the main control points for tension and winding. Note wire size and any gaps in the coil.
Extension and side-mounted systems
Side-mounted units run along the upper tracks and often have safety cables threaded through the coils. These cables contain broken bits and reduce risk if a coil fails.
Troubleshooting quick cues
- Uneven lift or one side higher than the other indicates uneven tension.
- A loud bang or visible gap means a broken coil; replacement is required.
- Noisy, jerky motion or opener strain suggests worn coils or frayed cables.
If hardware is rusted or cones look damaged, stop and call us. We verify door height and weight before we proceed and can recommend safe replacement or service. Call (321) 200-0727 for fast local help.
Tools, parts, and safety precautions you must have
Before we touch any hardware, we stage the work area so every move is controlled and safe. We arrive with pro-grade tools and PPE and follow strict safety protocols.
We make sure the opener is unplugged and the tracks are clamped above the lower rollers to lock the unit in place. Mark the current cone position and shaft flats before loosening any set screws.

Required tools
- Solid steel winding bars sized to cone holes (about 1/2 inch).
- Adjustable wrench, C-clamps, and quality PPE.
- Good lighting, a clear alternate exit, and tools staged within arm’s reach.
Critical precautions and prep checklist
- Stand to the side of the winding path and keep a firm grip on the bar at all times.
- Verify bar diameter matches the cone holes to avoid slip-throughs.
- Double-check set screws and shaft flats after winding so the cone locks down securely.
- We do not use screwdrivers as substitutes for winding bars.
These small steps cut risks, keep tension predictable, and help return your garage and door to reliable service fast.
garage door spring adjustment
A single quarter-turn can change balance—direction and control matter.
To increase tension and add lift, wind the cone upward. To decrease tension and ease force, wind downward. Make changes in quarter-turns and test after each move.
Use typical counts as a starting point: about 30 quarter-turns for a 7-ft unit and roughly 34 for an 8-ft unit. Treat these as guides, then fine-tune to the door’s actual weight and torsion specs.
Correct bar placement and set screws
Keep one winding bar seated in the cone while you move the second bar. This preserves control of the winding cone under load.
Tighten set screws onto the shaft flats to lock the tension. Record each quarter-turn so you can return to baseline if needed.
Why never use screwdrivers as winding bars
Never substitute a screwdriver for a winding bar. Screwdrivers can slip, bend, or pull out under tension and cause severe injury.
- We make small, repeatable changes and test between turns.
- Careful tensioning reduces opener strain and smooths travel.
- We document turns so future maintenance is simple and safe.
Step-by-step: adjust torsion springs safely and accurately
Before any turning, we immobilize the system and remove power to protect people and parts.
We close the unit, unplug the opener, and clamp the tracks so the assembly cannot move. One winding bar goes into the cone and we hold it firmly before loosening any screws.
Secure the door with C-clamps and disconnect the opener
We lock the rollers and cut power so the opener cannot engage. This keeps every move controlled and predictable.
Loosen set screws while holding the winding bar firmly
Keep the bar fully seated. Loosen the set screws slowly while the bar supports the cone. Never let the cone rotate uncontrolled.
Wind in quarter-turns; typical guidance ~30 quarter-turns for 7 ft
We add or reduce tension in quarter-turns, counting each move. Use ~30 quarter-turns for a 7-ft unit and ~34 for an 8-ft unit as a starting guide.
Tighten set screws, mirror the turns on the second spring, and recheck
Tighten screws onto the shaft flats and confirm the cone is seated. For two-spring systems, we mirror the exact turns on both torsion springs for level lift.
- We perform a halfway balance test to confirm the unit holds position.
- Then we reconnect the opener and verify travel, force, and smooth starts/stops.
- We record final turn counts and notes for your service record.
Step-by-step: adjust extension and side-mounted springs
Start by raising the panel all the way so the coils are relaxed and the system carries no load.
With the unit open, clamp the tracks to lock the position. This secures the assembly before we touch hardware.
Inspect the safety cables and coils closely. If any cable is frayed or any coil shows wear, we recommend replacement rather than attempting a fix.
Move the hook to change tension
To increase lift, place the hook in a higher hole on the track hanger. To reduce force, move it to a lower hole.
Secure the hook and tighten the hardware so the setting does not shift under load.
Balance both sides and restore safety features
We mirror each change on the opposite side so the panel rises level without binding or tilt.
- Reinstall the safety cables through each coil to contain energy if a failure occurs.
- Test by lifting and lowering the unit by hand before reconnecting the opener.
- Document the final hook positions so future service is simple and safe.
Note: When coils or cables show age, replace both side assemblies as a pair. That keeps tension even and reduces repeat visits.
Test, balance, and maintain: the final checks professionals rely on
We finish each visit with hands-on tests to verify safe, smooth operation.
Halfway balance test: With the opener disconnected, we lift the panel to the halfway point and let go. A properly adjusted garage door should hold position without drifting. That steady result confirms correct tension and mirror winding on torsion springs.
Halfway balance test and opener reconnection
After the balance test, we reconnect the opener and check travel limits. We verify photo eyes, force settings, and smooth starts and stops.
Lubrication schedule: lithium or silicone spray, not WD-40
Lubricate twice a year — spray springs, hinges, bearings, and metal rollers with lithium or silicone. Do not use WD-40; it dries and attracts dirt.
- Monthly quick visual check for cables, fasteners, and rollers.
- Listen for new noises over the next few cycles; quiet operation means success.
- A balanced unit reduces wear on gears, sprockets, and belts inside the door opener.
- Call us if balance changes — cable stretch or spring fatigue can follow.
We record what we adjusted, the final turn counts, and the recommended time for your next preventive visit. This simple routine keeps your system reliable and extends its life.
When to stop and call an expert
If you hear a single loud snap or see a coil gap, stop immediately and move everyone clear of the opening.
Danger signs:
- Sudden loud bang or visible broken coils—likely a broken garage door spring and not safe to touch.
- Frayed or loose cables, or a panel that won’t hold at half-height.
- Jerky movement or the opener straining against an unbalanced load.
These are not DIY fixes. Attempting to lift a heavy panel can cause serious injury and further damage. A broken spring cannot be repaired by winding; it must be replaced.
Fast local help: Garage Home Pros emergency spring repairs
We offer same-day emergency repair across Polk, Osceola, Lake, Orange, and Seminole counties. No after-hours fees. We bring matched replacement parts, verify cable condition, and restore safe tension before we leave.
Keep people and pets away and cut power to the opener if it continues to run. Call our friendly team for immediate, professional help: (321) 200-0727 or garagehomepros@gmail.com. We have provided reliable service since 2014 and prioritize clear pricing and safe results.
Local, family-owned help in your area
We schedule same-day visits and bring the parts and tools to finish most jobs in one call. Our team serves a 20-mile radius around Davenport, FL, including Polk, Osceola, Lake, Orange, and Seminole counties.
Service hours and coverage with no after-hours fees
Monday–Saturday, 8:00 a.m.–9:00 p.m. We are closed on Sundays. There are no after-hours fees, and we aim to arrive on time, protect your place, and clean up when we leave.
Contact Garage Home Pros: phone, email, and friendly pros since 2014
Call (321) 200-0727 or email garagehomepros@gmail.com for fast scheduling. We confirm pricing upfront and carry common parts so most repairs are completed in one visit.
- Key services: Garage Door Repair, Installation, Openers Repair & Replacement, Broken Springs Replacement, Repair Broken Cables, Door Off Tracks, Residential and Emergency Repairs.
- We service standard and side-mounted systems and coordinate specialty parts when needed.
- We respect your time and place, document work done, and leave things safe and quiet.
Conclusion
A methodical finish ties together safety, correct counts, and a simple test to confirm balance.
Recap the key steps from this guide: make quarter-turns, count turns (~30 for 7 ft; ~34 for 8 ft), mirror settings on both torsion springs, and secure set screws onto shaft flats. Use proper winding bars, clamps, and PPE so you do not rely on makeshift tools.
Always confirm spring tension with a halfway balance test and follow with lithium or silicone lubrication. If you see a broken spring, visible gap, or anything that feels unsafe, stop and call for professional help.
Need a hand? We’re here to help — call (321) 200-0727 or email garagehomepros@gmail.com for fast, friendly, and reliable service today. We serve Davenport and nearby areas with same-day visits, no after-hours fees, and clear pricing so the door opens safely every time.